How To Upload An App On The Google Play Store? Step By Step Guide


Uploading an app on the Google play store is super easy. It is such good news for all the android developers who want to share their amazing apps with millions of Google play users. You can upload your app on Google play store by uploading APK files or Android Studio.
First, Create Your Account
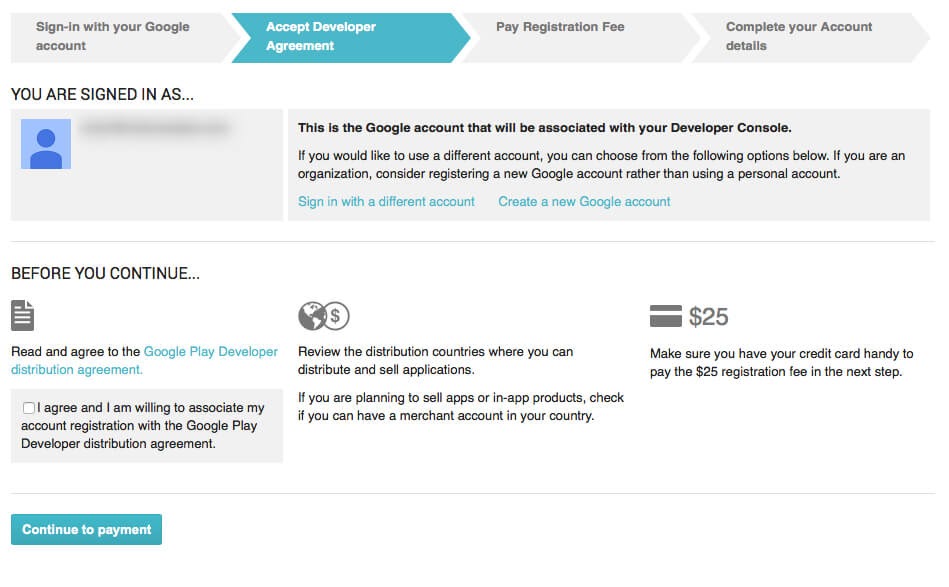
For creating an account you need to visit the Google play developer website (play.google.com/apps/publish) and create a new account if you do not have one yet. If you already have an existing Google user then use that, otherwise create a new Google plus account by following these steps:
Go to this link: https://www.gstatic.com/googlePlay/signup_androidapp and follow its instructions to create a Google plus account.
After your Google plus sign in, on the google play developer console website click on the option “My apps” on the sidebar menu. Here you will find several options for uploading apps like Upload Binary, App releases, etc.
Click on the uploaded binary option to continue with uploading an android app onto the Google play store.
Open Google Play developer site (play.google.com/apps/publish) and create a new account or log in using an existing Google user account if you already have one (use this link:https://playgoogle.com/apps/publish/signup)
After login, you will find the following main menu options on the Google play store developer’s website: Dashboard, Store presence, In-app products, and API Console. Click on Dashboard to continue uploading the android app on the Google play store. You will find detailed steps below.
But if you need a quick consultation or mobile app development strategy, we are here to help. MMCGBL supports startups and provide robust solutions to the business owners. From small-size business to enterprise-level, we have effective strategies that make mobile app development, game development, and marketing successful.
Step-By-Step Guide For Uploading App In Google Store
Google is a multinational corporation that provides online services and products such as google play store.
In the Google play store, you can download many different apps to your phone. Unfortunately, Google does not allow everybody to upload an app on the Google play store, but there is a way of uploading your apps!
But before we start:
- Do not upload the same app with another account if it was deleted by Google (ban).
- Be sure that you check all the requirements for uploading app on the Google play store because Google will delete your app if it doesn’t meet their requirements!
Requirements for uploading apps:
- Apps must be uploaded in the correct category.
- Your “Developer Name” must match the name displayed with your App’s public details. You can upload an app that is up to 50 MB.
- Your APK, promotional graphics, and all text are limited to 100 KB.
- Verify your website in Google webmaster tools before uploading app on the Google play store.
How to upload an app on the Google play store
1) Open Google Play Store
I know it’s understood but to start with the scratch, I have to say this.
Starting with the Google play store, you will find multiple options and thousands of applications. Keep up the straight with a second step.
2) Click To the Menu
Click on the menu which you can see at the top left side of the Google play store.
- You have to click on ” All Application”
- After clicking it, “All Application” will open and show you all your apps that have already been uploaded.
- If you don’t have any app, click on the “create application” button which is at the right corner.
3) Fill Out The Information
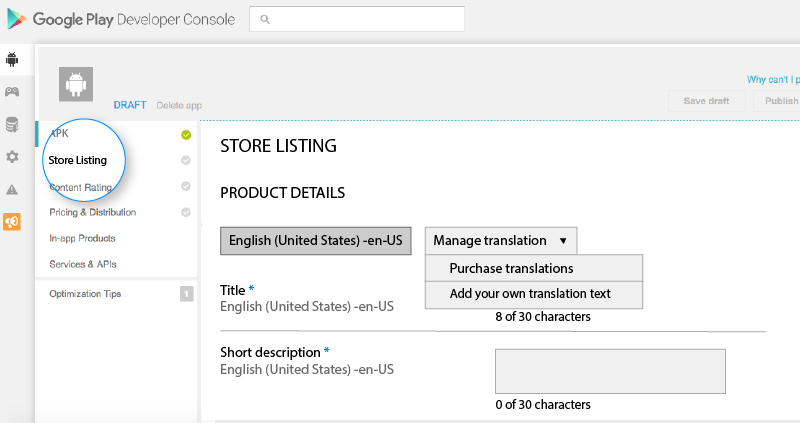
Now, Google will ask you for some information about your app, let’s say that we want to upload a game.
You will see something like this:
Title:
The name of the app which you want Google play store to show when somebody is searching for an app.
Description:
You must use information about your app here! For example: If it’s a word or memory game write words and if it’s a racing game write racing. Google has also limited the number of characters so don’t forget to be brief!
Website URL:
The website where your readers can find more information about your apps.
Now Google will check if all requirements are met by the Google play store, but Google also will check if you are writing real information about your app! If Google play store finds out that some of these requirements are not met or that you have written fake information about your app Google will delete it.
4) Select the Package Name & Version Code
Next, Google will ask you what type of app you would like to upload, click on “Android App”. After this Google play store will show a form with 2 important fields: Package Name & Version Code.
The package name is a unique identification number for every new version of the same app which was uploaded on the Google play store. If you want to keep up with all updates of your previous versions, Google doesn’t allow more than 100 different package names!
Version code is a version management system in the Google play store. When you upload an app Google will assign a version code automatically, but you can overwrite it!
Now Google play store will ask you for some screenshots of your app, download the screenshot images if Google asks you to. You can choose any pictures which are representing your app on the Google play store!
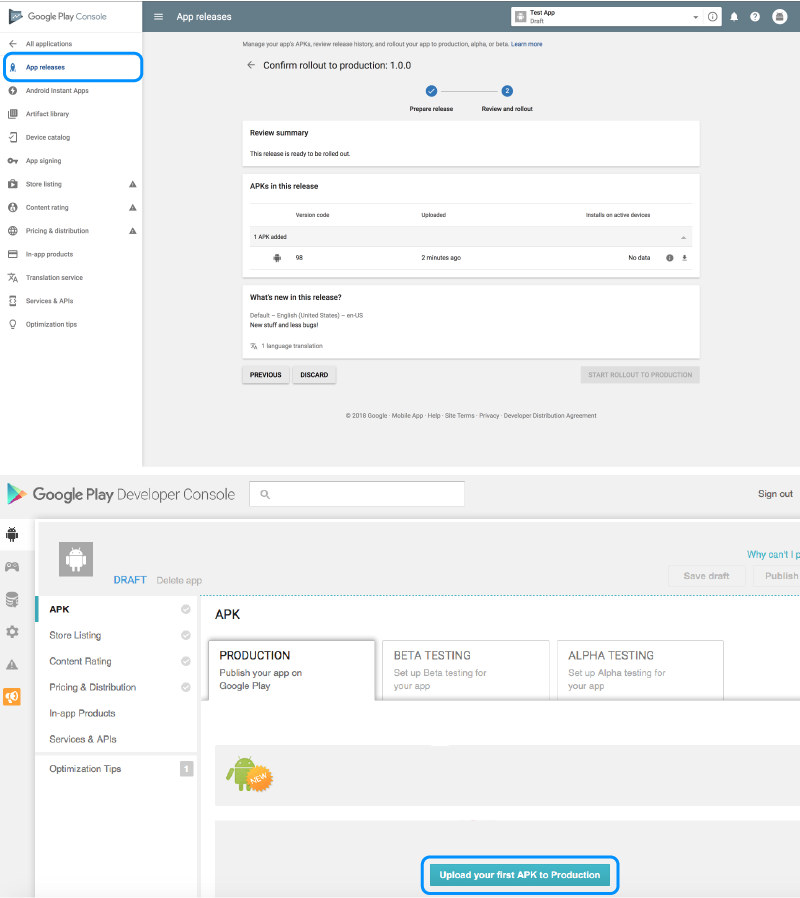
5) The last step is uploading your APK file
Google wants to know if your uploaded APK file is not corrupted or broken, so Google requires that you upload an APK! So go on Google drive and select the folder where all of your APKs are saved, click on one APK, and press “UPLOAD”!
6) Google Start to Review
If Google didn’t find any reason to delete your app Google will show you an overview with all information about the uploading of your app on Google play store, click on ” DONE” and Google will start checking if your uploaded APK file is not corrupted or broken.
After this Google play store will send a notice that your new app is ready for publishing, Google has started checking if everything went well!
7) Testing your APK file
Now it depends on Google play store how long they need to keep testing your APK file, but Google says it can take up to 48 hours! But in some cases, Google needs more than 2 days so be patient.
8) Congratulations! You have uploaded an android game or application on the Google play store!
You can go back to the Google play store and see if your app is online, click on “My Apps” and you will find the newest uploaded apps at the bottom of the Google play store!
How to create a Google wallet merchant and link it to your developer account
I will also be showing you how to set up automatic payment profiles so that when someone makes a payment, Google automatically charges the correct card number for the appropriate amount without requiring any additional steps from the buyer.
First, set up a Google Wallet merchant account by following these simple steps:
1) Sign in to Merchant play store here
2) Click ‘Merchant Accounts’ in the left-side menu
3) Click “Set Up Payments” in the left sidebar
4) Fill out your banking information
5) You can now add a logo by clicking on “+ Add Image,” then click “Accept Changes”
6) Once successfully verifies your bank information, Google will provide you with a “Merchant ID.” Copy this number down, it’s the only way Google knows who to charge for your Google wallet transactions.
Integrate Developer Account
Now that we have our Google merchant account set up, let’s link it to your developer account so Google knows which app should be receiving the payment:
1) Sign in to your developer console here
2) Click on edit under “Linked Applications”
3) Paste in the Merchant ID from earlier
4) Hit save and all payments made from now on through Google wallet to your website should automatically be received by your developer console.
That was easy!
Add Some Automatic Payment Profiles
Now let’s add some automatic payment profiles so Google knows who to charge when a transaction is made.
1) Sign in to the Google wallet merchant site
2) Click on “Payment Methods” in the left-side menu
3) In here, you will see a list of all credit cards Google wallet can accept
4) You can add one profile for each card by clicking “+ ADD PROFILE,” then filling out your bank info and selecting a picture
5) When someone makes a payment, Google will automatically charge them using this information.
Now that we have everything set up, anyone with Google wallet may pay through your website or app! To learn how Google validates transactions and prevents fraud, visit their page here. If you have any questions let me know below!
Wrapping Up
After successfully uploading files, you need to schedule the release of an android app on the Google play store by selecting appropriate options from In-app products and App releases menu options. Choose the In-app products option from the Google play developer website dashboard to continue with releasing your android application on the Google play store in a couple of minutes.
You may choose the pre-registration option which is sometimes helpful when your apps require extensive testing before going live in the Google play store. Choose an option available to you for continuing with the Google store release process.
Here you will find all important information related to Google plus accounts like payments, ads, etc so please check this section often after signing up with the Google plus account.
The journey doesn’t stop at publishing. There are over 2 million apps on the Google Play Store and your mobile application needs an active marketing strategy to pop up for users!
If you want it to succeed, remember that running a successful app isn’t just about one time efforts-it’s going be require continuous work from us as well so we can stay ahead of the competition in this increasingly cutthroat industry where CEOs earn more than Hollywood stars do. Let our experts help guide those steps towards success; after all nobody knows what works better than them right?


