How to Start Successful iOS Application Development – A Guide For You
IOS application development can seem like a daunting task. But with the right tools and resources, it can be a fun and rewarding process. In this guide, we’ll walk you through everything you need to know to start creating your own iPhone or iPad app. We’ll cover topics ranging from picking the right development tools to submitting your app to the App Store. So whether you’re a beginner or a pro, this guide has something for everyone!
What is iOS application development?
iOS application development is the process of developing apps for the Apple operating system. Developing an iOS app is a lengthy process and needs expert iOS developers who understand the thick and thin of the core functionality. iOS app developers use multiple tools, frameworks, and programming languages to build successful apps for their clients. Swift, XCode, AppCode, Transporter, etc, are the most common tech stacks developers use.
This walkthrough focuses on using Xcode 5 with Objective-C as the programming language. If you know another programming language besides Object C, feel free to use it or any other tool available.
Essential System Requirements
Apple only allows applications that run within its OS, Mac OSX 10.8+ (Mountain Lion) or iOS 7. iOS apps will only run on IOS devices, iPod Touch, iPhone, and Ipad. Therefore if you want to develop for both platforms, you will need two separate developer accounts. For Xcode, there are system requirements for the development machine in order to install it. You can download a PDF of the requirements from Apple: here:http://developer.apple.com/library/ios/#releasenotes/General/WhatsNewInXcode/Articles/xcode_4_3_3_release_notes.html
Mac System
Apple has some specific guidelines for developing applications for the iOS platform. All of the iOS apps are developed using the Xcode IDE provided by Apple itself. You need a Mac system with the installation of an Xcode development environment in order to start iOS application development.
However, if you do not have a Mac system, it is possible to test your applications on both simulators as well as emulators too instead of real iPhones or iPads, which is quite costly sometimes. If you want to test your application based on iOS profiles, it is possible using an iPhone or Ipad device.
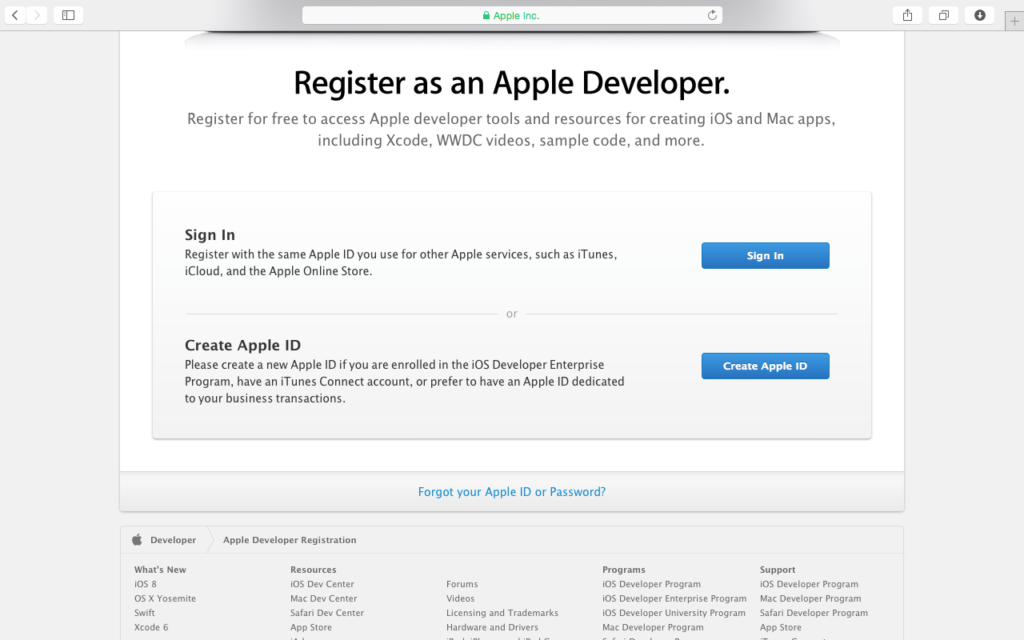
Register for an Application Developer Account
Follow these steps to register as an IOS developer:
I have read that you can do a trial account. But I didn’t want to install Xcode without being able to download iOS apps onto an iOS device. I downloaded the latest version of Xcode from the Mac App Store once it was installed and opened the program.
Steps To Follow For Developer Account
In order to start iOS application development, there are several things you need to do after registering as an iOS Developer:
- In developer accounts, click on “Certificates, Identifiers & Profiles”
- Click on “Identifiers”, select “App IDs,” and create a new one by clicking on “+.”
- Click on “Provisioning Profiles” and create a new one by clicking “+.” I called my ‘iOS Application Development. Maybe you had to go through Apple’s verification process before downloading the profile. I believe it is automated, so I would recommend waiting until your profile is verified before installing Xcode or building IOS apps.
- You will need an iOS Developer account to run iOS applications on an iOS device. Click on the “iOS Provisioning Portal” in order to register for one.
Register Your Account
For iOS application development, you need to register yourself in the iOS Developer center at http://developer.apple.com/ios
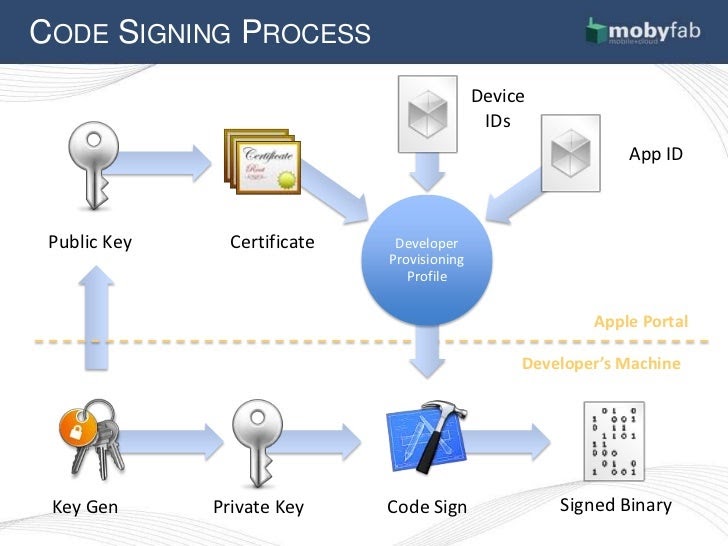
Once you register your profile, you get the option to enable developer mode on Iphones and Ipads for testing your applications. You can create iOS certificates that uniquely identify your iOS application (similar to the Android package name). Once the certificate is created, it must install on the desired iOS device if you want to test your application there.
An iPhone or Ipad connected through a USB port with a Mac system should always be trusted using a development provisioning profile while developing applications using Xcode IDE. To make sure the iOS device is trusted, iOS developer mode in iOS devices must be enabled, and the iOS development provisioning profile in Xcode IDE should be installed for iPhone or Ipad.
Install iOS development provisioning profiles using the below steps: – You need to open your iPhone or Ipad, go to settings -> general -> about -> Certificate Trust Settings (BTSTask), and follow the instructions.
Do you also need to install IOS provisioning profiles on the Mac system by following these simple steps at How To Install Provision Profile On Mac?
How to install profiles on MAC
Simply you have to find the .mobileprovision file and double-click on it. A dialog box will appear asking if you trust the developer. Click “Trust.”
How to install iOS profile on iOS Devices
To install iOS development provisioning profiles on iPhone or Ipad, go to settings -> general -> profile -> device management and click on your iOS developer account name. You will be asked for a password. Provide your iOS developer account password again and click on the “Add” button. Now you can find added iPhone or Ipad under the device management list. So you need to trust that the iPhone or iPad is using certificates that you have created for this purpose through Xcode IDE at the first step, while iOS application development projects use Xcode IDE.
Installation of Xcode
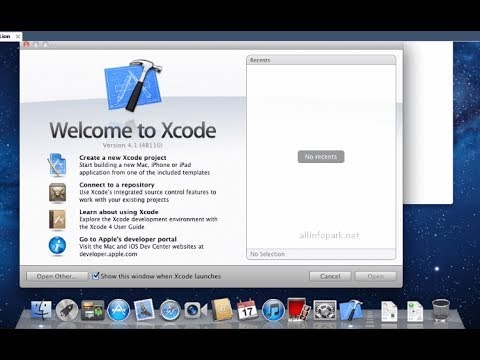
You can download the latest version of Xcode from the Mac App Store if you have Mac OSX 10.8+. I did not want to install all the development tools, so I installed Xcode 5 for IOS devs which include IOS simulators, iPod Touch or iPhone emulators, and iPad simulators. This allows me to start iOS application development using Objective-C without having an IOS device.
Download Xcode from the Mac App Store here: https://itunes.apple.com/us/app/xcode/id497799835?mt=12
Xcode IDE comes with many tools for iOS application developers, including a source code editor, debugger, etc. Xcode Ios IDE also allows iPhone or Ipad simulators to be launched for testing your IOS Apps (in case you do not have iPhones or Ipads). Simulators can be used in case real devices are not affordable for you or they cannot provide enough time to test your applications properly on different Ios versions etc. For example, an IOS device with iOS 9 and above can run most IOS applications as it is backward compatible with IOS versions. iPhone or Ipad Ios versions IOS 8, IOS 9, and IOS 10 are available now for different iPhone models from Apple itself.
However, if your iPhone or Ipad iOS version is too low, then you may not be able to run the latest version of that app on your device because the minimum requirement demands a higher Ios version than what you have installed on your device.
Xcode IDE provides many ways to choose specific Ipads and Iphones profiles using Xcode “Product” menu options while creating new iOS application development projects. This way, you can choose any iOS device, including emulators, for testing purposes based on project requirements by choosing the appropriate target IOS devices, iPhone, or Ipad profiles that your IOS app is targeting.
Version Setting
Every iPhone or Ipad Ios version target setting in Xcode may need different iPad and iPhone profiles that you must be aware of when you are selecting iPhone or Ipad profiles for application development. Generally, earlier IOS versions like IOS 7.1.2 to 8.3 are compatible with most of the apps. While the latest IOS 9 and above is supported by a fewer number of apps. Most modern apps support these new Apple’s latest iOS 9 or higher versions (iOs 10). You can select any available simulators along with real physical devices.
- Do’s and Don’ts to Avoid Application Rejection
First of all, don’t hesitate to take help from experienced and professional app developers. You can also contact us for consultation or give us your project to build effective iOS application development. At MMC Global, we provide Android and iOS application development, no matter how complex the project is.
We take care of all ups and downs also, and the process and strategy we follow make our clients satisfied. From discussing, prototyping, and MVP, to development and testing, we cover all essential steps to build exciting apps.
So, there are many common reasons why a developer’s application gets a rejection from the IOS app store, such as:
- iPhone or Ipad not using IOS 7.1 and above versions (IOS 10) and iPhone or Ipad iOS version are lower than what the application requires. (minimum requirement).
- iOS apps that cause low frame rates even on the latest iPhone/Ipad models.
- Not following Apple’s Design and Development Guidelines – Ios Developer guidelines.
You must follow these guidelines while developing an iOS application. It makes your app approved for the app store without any problem.
How To Submit Your iOS Application at App Store
There are some basic guidelines for iPhone or Ipad apps while submitting your apps in the App store. Such as:
- Mandatory 2 screenshots of your application (one for list view and the other for full screen) along with “how to use” texts. (both can be done using Xcode IDE).
- Do not include non-English characters like Arabic, Chinese, etc., in iPhone or iPad application names without adding an English version of it, too, with iOS internationalization localization. ( iPhone or Ipad applications must have an English version when submitting the IOS app in the app store).
- iOS apps that do not support the latest IOS versions may get rejected from the IOS App Store.
- iPhone or Ipad applications must use application icons that are in 1024 x 1024 pixels size, and they can be in JPEG, PNG, or TIFF format. (Xcode IDE automatically generates appropriate resolution for your iPhone/Ipad icons while creating new iPhone/Ipad projects).
- Do not include any personal information like email IDs in the description section of your iOS apps without encrypting them using DES or AES etc., encryption coding techniques. (If you need to provide some links related to your app, then the IOS app store recommends this way of doing it).
- iPhone or Ipad Ios version is too low than what the application requires. (minimum requirement).
- IOS apps crash very frequently.
- IOS apps that cause low frame rates even on the latest iPhone/Ipad models.
Conclusion
If you are looking to develop an iOS app, make sure that you have the proper system requirements and tools in place. Following Apple’s design and development guidelines are essential to getting your app approved by the App Store. Our guide provides an overview of what you need to know before starting your project. Have you started developing your iOS app yet? What has been the most challenging part for you so far? If you need any consultation or want to hand over your project to us, we are here. Get in touch with us!


